There’s a big buzz around the new 32bit SKR boards available from Bigtreetech. There are now four flavours, the larger SKR v1.3 and Pro v1.1, and the smaller Mini E3 and the E3 Dip. The last two are direct swap in replacement for the existing Melzi board that is shipped with the Ender 3, the larger boards will require a new case to be printed for them like this.
So what’s the hype? Well 32bit boards are the future for 3dprinting. The existing melzi board in the Ender is a known bottleneck, this is why many people use Klipper running on a Raspberry-Pi that takes on all the processing and prevents the bottlenecking.
The drivers that are now available are just getting better and better, the TMC2209s are the new kids on the block, handle large amps but as they’re not shipping for many weeks, I went for the TMC2208s v3 with UART. These are silent drivers and are really nice, they come with stealtchop and are near silent in operation, to the point where the fans are now annoying!
I recently had the E3 Dip arrive in the post with four TMC2208 v3 drivers with UART enabled. The previous drivers required precise soldering of the J2 tabs on the driver and running a jumper cable to the board, these new v3 come with the jumper pre soldered and the board offers no need for the cable.
There’s currently no tutorials on installing this board, I had a bit of a challenge since I’m not particularly au fait with Marlin 2.0 so here’s my steps, first installing the board and then configuring the current build of Marlin2.0_bugfix. This is quite a long post, so strap in and get ready!
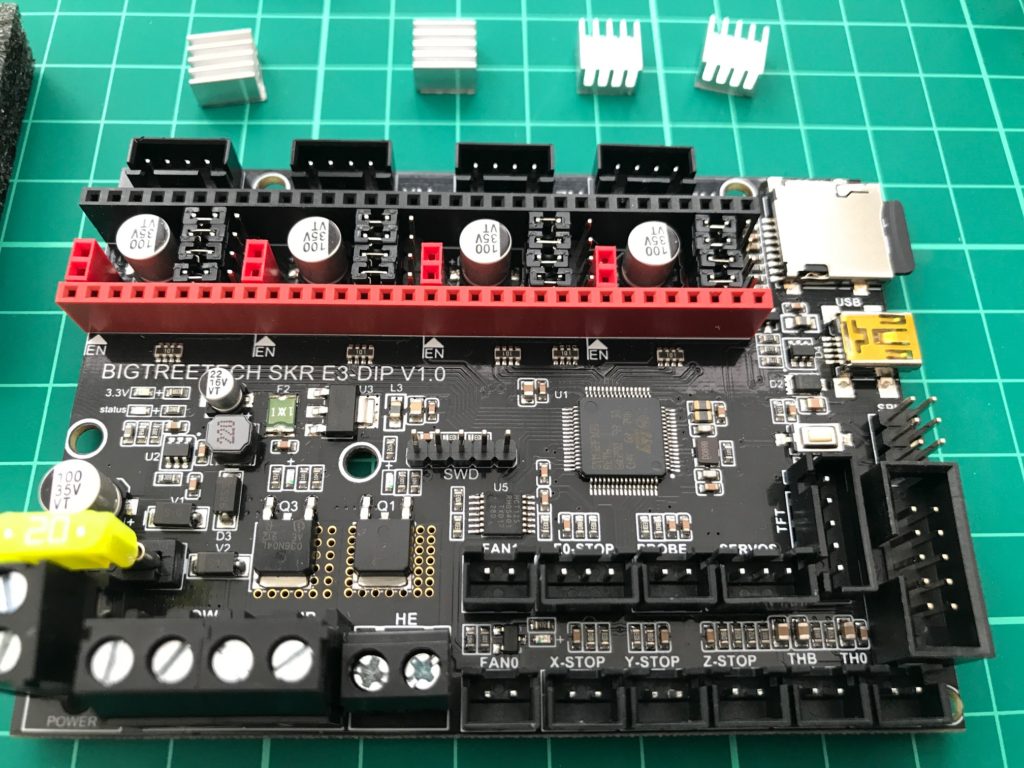
First things first, lets setup the board. It comes with all the jumpers fitted to the pins under where the drivers sit, carefully remove all these jumpers, using tweezers is advised. Check the documentation for putting them into UART mode incase anything has changed from this, if not then refit the four jumpers as required like so to enable UART:
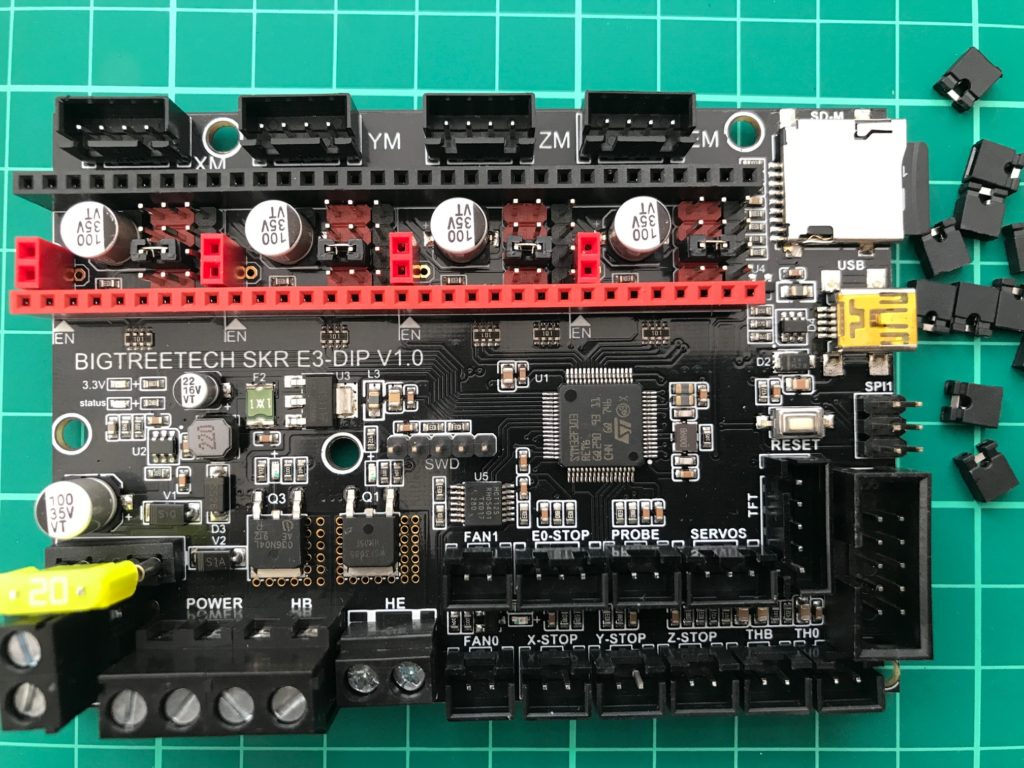
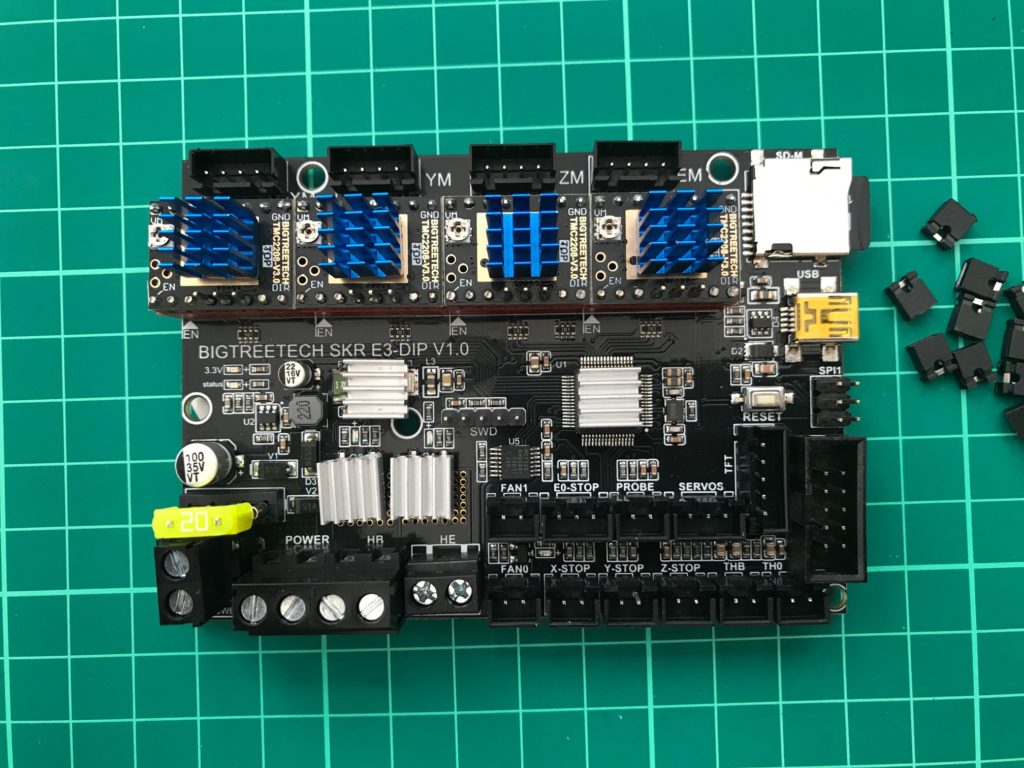
Pop the drivers on, paying attention to rotation direction. Note the EN markings on the driver and on the board in the lower left corner of each driver, also the pins are marked with red and black to make sure you don’t cock it up. Fit the heatsinks to the drivers, and to the board:
Now to install the board. This is a very straightforward process. On the pro the motherboard access is on the bottom of the printer, firstly push the bed all the way back and unscrew the two screws on the top of the compartment. Then flip the printer on it’s side, supporting it well, and remove the three small screws on the bottom.
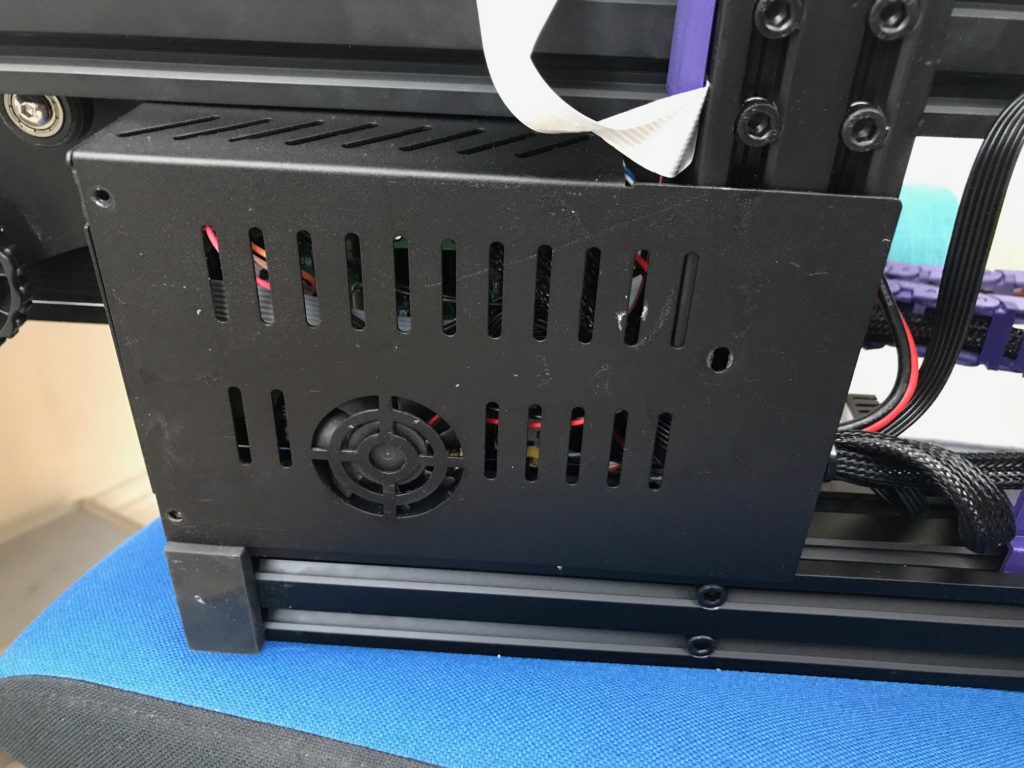
The lid on the compartment will now fall away, with the fan attached, unplug the fan so it doesn’t hang on it’s connector.
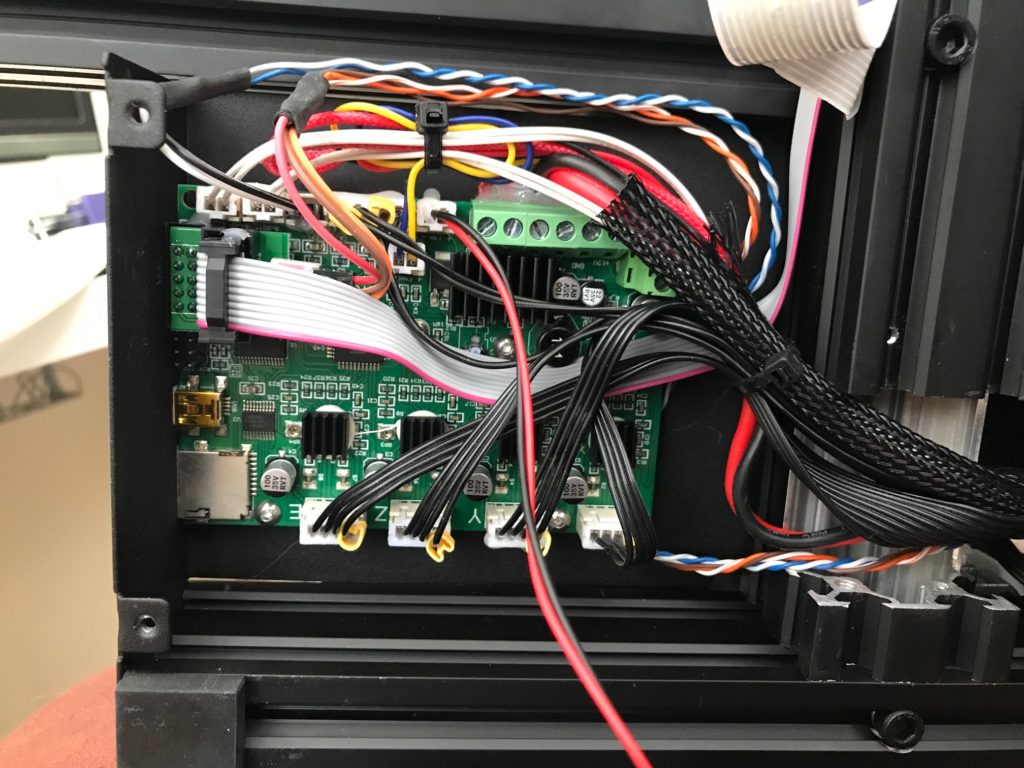
Above is a pic of the original Melzi board in situ, note the Pin27 board adapter for the BLTouch that’s required and the extra wiring for it. The two wires hanging down are the connected motherboard fan. You’ll see that each plug is held in with hot glue to keep them in place, this is easy to remove, just carefully cut at it with a knife and pull it away with long nose pliers. I took this moment to sort out some wiring and also tape up the sharp edges of the aluminium extrusion, I cut back the plastic wire shielding and fitted some heatsink to stop it sliding back and forth as you’ll see in latter pictures.
Now to fit the new board. Remove one wire at a time and fit to the new board, everything is pretty much the same but it’s worth checking the pcb/pinout diagrams on the BigTreeTech’s github manual to make sure nothing has changed. TeachingTech did a nice video of the installation of the E3 Mini and provided these two nice pictures of where each connector goes. Here’s the Melzi board and here’s the SKR, move one connector/wire from one to the other. Be methodical, work through them, making sure each connection is tight and no bare wire is visible. This is how mine turned out:
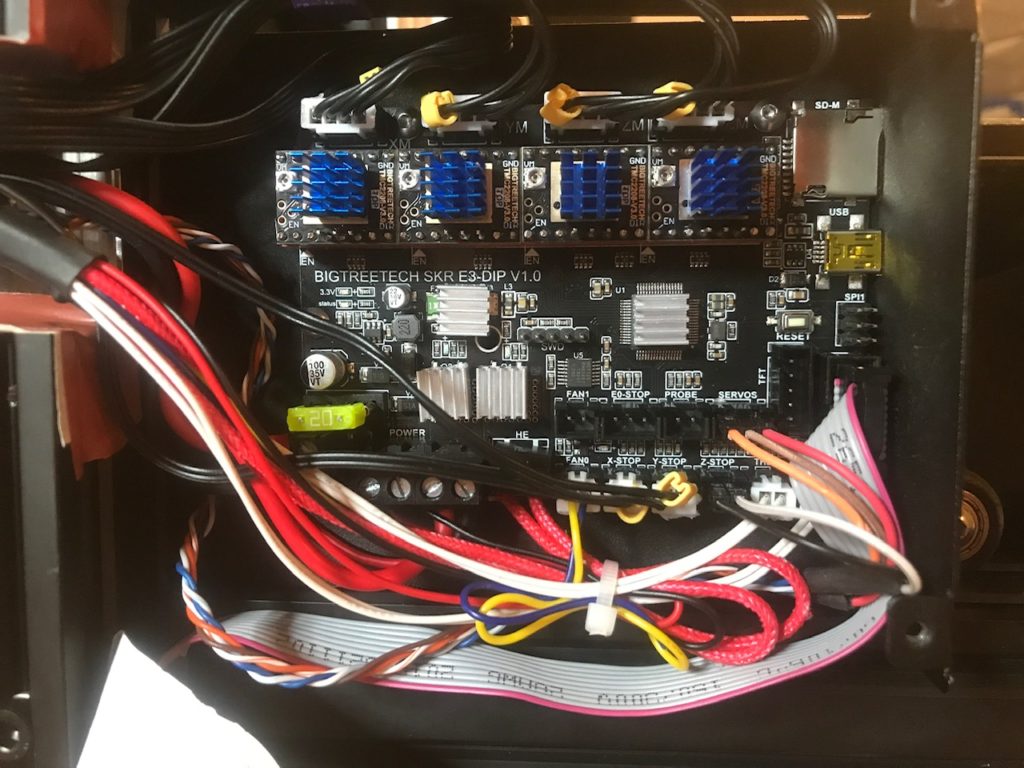
I decluttered and tied back wiring as best as I could, these drivers can get warm so it’s nice to have some airflow around them not interrupted by the wiring. Also note my BLTouch is wired to the SERVO port, not the PROBE port, and the two data cables are plugged into the Z-Stop switch port. Once again I followed TeachingTech’s BLTouch wiring diagram here.
Double check everything, make sure all connections are snug and nothing will drop out, if any feel remotely loose then it’s worth using a hot glue gun on the plugs to prevent them from shifting. Once happy, refit the motherboard fan to the FAN1 port, and close up the case. It’s now time to work on the firmware, be aware, my settings are for a BLTouch so don’t pay any attention to that part if you’re following this.
I don’t trust the BigTreeTech firmware on their github page too well, it’s fairly old, I did use it initially but then went with vanilla Marlin 2.0.bugfix so that’s what I’ll outline.
Download the latest version of Marlin 2.0.bugfix from their github page here. Click the green Clone or Download button, and download zip, extract the entire folder to your prefered location. Next download Atom the free text editor, much akin to notepad++ but more support. We need Atom as we’re going to have to compile the firmware for the printer to read it. Once downloaded, install, then open and we’ll install platformio-ide. Do this by clicking File – Settings, then the +install tab. Search platformio-ide and click install, like below, although mine is already installed.

Okay, time to get going on this firmware, what we need to do is first setup the fw to know the printer, then tell it what drivers we are using, then setup the BLTouch. Before we open the firmware we’ll copy over the ender3 settings so, navigate to the folder:
/Marlin-bugfix-2.0.x/config/config/examples/Creality/Ender-3
Copy the files: _Bootscreen.h, _Statusscreen.h, Configuration_adv.h and Configuration.h and overwrite the existing versions in the folder:
/Marlin-bugfix-2.0.x/Marlin/
Now open Atom, if on Windows, right click and Run as administrator so it’s got admin rights. Open the folder, click File – Open Folder, select the /Marlin-bugfix-2.0.x folder and click open.
Now in Atom open the platformio.ini file, change:
default_envs = megaatmega2560
to default_envs = STM32F103RC_bigtree
Scroll down a few lines and change the below, make sure you add the TMCStepper lib for the TMC2208 from BigTreeTech, then comment out the lower libs as you don’t need them:
lib_deps =
 U8glib-HAL=https://github.com/MarlinFirmware/U8glib-HAL/archive/bugfix.zip
 LiquidCrystal@1.3.4
 https://github.com/bigtreetech/TMCStepper
 #TMCStepper@<1.0.0
 #Adafruit NeoPixel@1.1.3
 #LiquidTWI2=https://github.com/lincomatic/LiquidTWI2/archive/master.zip
 #Arduino-L6470=https://github.com/ameyer/Arduino-L6470/archive/dev.zip
 #SailfishLCD=https://github.com/mikeshub/SailfishLCD/archive/master.zip
 #SailfishRGB_LED=https://github.com/mikeshub/SailfishRGB_LED/archive/master.zip
 #SlowSoftI2CMaster=https://github.com/mikeshub/SlowSoftI2CMaster/archive/master.zip
Search the platformio.ini file for [env:STM32F103RC_bigtree], it’s about half way down. Change this line: ${common.build_flags} -DDEBUG_LEVEL=0 -std=gnu++14 to this ${common.build_flags} -DDEBUG_LEVEL=0 -DHAVE_SW_SERIAL -std=gnu++14
Save the platformio.ini tab and close it.
Now in atom navigate into the marlin folder and click on the file configuration.h, search and replace the text as below to setup the Ender3:
1)define SERIAL_PORT 0
to define SERIAL_PORT -1
2) //#define SERIAL_PORT_2 -1
to #define SERIAL_PORT_2 2 (note removal of quotes // to define it)
3) #define MOTHERBOARD BOARD_MELZI_CREALITY
to #define MOTHERBOARD BOARD_BIGTREE_SKR_E3_DIP
4) #define SPEAKER
to //#define SPEAKER
Now to let the firmware know which drivers you have installed:
1)//#define X_DRIVER_TYPE A4988
to #define X_DRIVER_TYPE TMC2208
2)//#define Y_DRIVER_TYPE A4988
to #define Y_DRIVER_TYPE TMC2208
3) //#define Z_DRIVER_TYPE A4988
to #define Z_DRIVER_TYPE TMC2208
4) //#define E0_DRIVER_TYPE A4988
to #define E0_DRIVER_TYPE TMC2208
I wanted to stop the PWM wine on my 5015 blowers so changed:
//#define FAN_SOFT_PWM
to #define FAN_SOFT_PWM
Now save configuration.h, open configuration_adv.h and search for:
#if AXIS_IS_TMC(X)
Below this change the value on the line #define X_CURRENT 580 to 600. Do this for #if AXIS_IS_TMC(Y), #if AXIS_IS_TMC(Z), #if AXIS_IS_TMC(E0).
Next change //#define MONITOR_DRIVER_STATUS to #define MONITOR_DRIVER_STATUS thus enabling it.
Change //#define TMC_DEBUG to #define TMC_DEBUG
At this point you’re done if you’re not using a BLTouch. Press the tick on the left and let it compile, hopefully you’ll get a success message. You can click the top PlatformIO menu button and Toggle Build Panel to watch it compile. If it fails, check all the above again.
If this passes then your new firmware file will be located in and is called firmware.bin. Copy this to your microsd card, insert in the printer and power on, it’ll take about thirty seconds to boot up but will be updated. Now print away!
To setup the BLTouch there’s additional editing to do, firstly in configuration.h:
1)//#define ENDSTOPPULLUP_ZMIN_PROBE
to #define ENDSTOPPULLUP_ZMIN_PROBE
2) #define Z_MIN_PROBE_ENDSTOP_INVERTING false
to #define Z_MIN_PROBE_ENDSTOP_INVERTING true
3) //#define BLTOUCH to #define BLTOUCH
4) Now search for #define NOZZLE_TO_PROBE_OFFSET, we need to set up the distance the probe is from the nozzle, measure the distance using calipers. The diagram above it shows how to work it out, mine is as follows:
#define NOZZLE_TO_PROBE_OFFSET { -41, -16, 0 }
5) #define MIN_SOFTWARE_ENDSTOP_Z to //#define MIN_SOFTWARE_ENDSTOP_Z
6) //#define AUTO_BED_LEVELING_BILINEAR to #define AUTO_BED_LEVELING_BILINEAR
7) //#define Z_SAFE_HOMING to #define Z_SAFE_HOMING
Save configuration.h and open configuration_adv.h, change the following:
1)//#define BABYSTEP_ZPROBE_OFFSET to #define BABYSTEP_ZPROBE_OFFSET
2) #define BABYSTEP_MULTIPLICATOR 1 to #define BABYSTEP_MULTIPLICATOR 10
3) //#define BLTOUCH_FORCE_SW_MODE to #define BLTOUCH_FORCE_SW_MODE
3) If you compile and run out of room then in configuration.h Disable bootscreen to save space #define SHOW_BOOTSCREEN to //#define SHOW_BOOTSCREEN
4) if you’re still low on space then change define #ARC_SUPPORT to //#define ARC_SUPPORT
5) To check you can write to the emulated eeprom, make sure that define #EEPROM_SETTINGS is defined and not commented out.
6) When I did an auto-home on the printer the axis were moving the incorrect direction and not finding the endstop switches. I had to invert the axis directions so in configuration.h I changed #define INVERT_X_DIR true to false, #define INVERT_Y_DIR true to false, #define INVERT_Z_DIR false to true.
All done! Now click the save and the compile tick and we should be grand! Once done navigate to the folder, which is on my mac: /Marlin-bugfix-2.0.x/.pio/build/STM32F103RC_bigtree and copy the firmware.bin file to your microsd card. Whilst you’ve got a window open on the microsd make a file called eepram.dat so you can save your offset to it. Put the microSD card in the printer and turn on, it should take 30 seconds to boot as it loads the new firmware and you’ll get a beep. Navigate to settings and click initiate eeprom, then adjust your z offset and click save settings, now you’re good to print.
